From Design to Completion: How Custom Outdoor Kitchens Are Built
A custom outdoor kitchen is one of the most rewarding upgrades for Napa Valley homeowners. It’s not just a place to cook—it’s a space designed for entertaining, sharing meals with friends, and creating a seamless extension of the home. But while the finished product looks effortless, many homeowners wonder what it actually takes to bring one of these luxury projects to life.
The truth is, no two kitchens are exactly the same. Each design reflects the homeowner’s lifestyle, property, and goals. Still, most projects follow a series of common phases that carry the idea from the first consultation to the final reveal.
In this guide, we’ll walk through the typical stages that show how custom outdoor kitchens are built, so you’ll know what to expect if you’re considering one for your home.
Typical Phases of a Custom Outdoor Kitchen Project
If you’re considering a luxury outdoor kitchen, it helps to understand how custom outdoor kitchens are built. Every project is unique, but most follow a series of stages that take you from the first design conversation to the final handover.
By seeing the process as a roadmap, you’ll know what to expect at each step, avoid common surprises, and feel confident about the investment. In most cases, each phase builds on the last—design informs planning, planning supports construction, and craftsmanship brings the vision to life.
While the details will depend on your property, budget, and lifestyle, the stages below represent the typical flow of a custom outdoor kitchen project.
Phase 1: Consultation and Vision Planning
Every successful outdoor kitchen begins with a conversation. This first phase is where you share your vision, lifestyle needs, and budget with a design professional. Do you want a space that supports large dinner parties? Or are you imagining quiet family evenings around a pizza oven and fireplace? Defining these goals early helps set the direction for the entire project.
During consultation, a designer will often ask about:
- How you plan to use the space — frequent entertaining, casual dining, or a mix of both
- Your preferred style — modern, rustic, or something that blends seamlessly with your home’s architecture
- Budget expectations — setting a realistic investment range to guide material and appliance choices
For you as the homeowner, this stage is critical. A clear design vision not only prevents costly changes later but also ensures that the finished outdoor kitchen reflects the way you truly want to live.
Phase 2: Design and Visualization
Once the vision is defined, the next step is turning ideas into a workable plan. This is where your outdoor kitchen starts to take shape on paper—and on screen. Professional designers often create concept drawings and 3D renderings so you can see how the space will look and function before a single stone is set.
For homeowners, this stage provides clarity. It’s one thing to describe a kitchen with a bar, grill, and seating area; it’s another to view a realistic rendering that shows how those features fit into your specific property. Being able to “walk through” the design virtually makes it easier to adjust details early, such as:
- Expanding or reducing counter space
- Relocating a pizza oven, grill, or bar area for better flow
- Rethinking seating to make gatherings feel more comfortable
- Adjusting the orientation to capture views or maximize shade
Another critical part of this stage is utility planning. Outdoor kitchens often require gas lines, electrical wiring, and plumbing, all of which must be mapped out in detail. Addressing these considerations in the design phase helps avoid costly surprises during construction.
By the end of this phase, you’ll have:
- A clear visual of the layout and design features
- A working plan for materials and finishes
- Utility requirements mapped out and ready for construction
This phase acts as the bridge between imagination and execution, giving you the confidence that your outdoor kitchen will look and function exactly as intended—and helping you see more clearly how custom outdoor kitchens are built from the ground up.
Phase 3: Site Preparation and Utilities
With the design finalized, the focus shifts to preparing your property for construction. This stage may not be as visually exciting as selecting finishes or appliances, but it’s one of the most important steps in ensuring your outdoor kitchen functions safely and efficiently.
Proper site preparation sets the foundation—literally—for everything that follows. Depending on your property, this can involve grading the land, pouring a concrete pad, or even reinforcing existing patios to support heavy stonework and appliances.
Utility planning also comes into play here. Because outdoor kitchens rely on multiple systems, careful coordination is essential. This phase typically includes:
- Plumbing for sinks, ice makers, or outdoor dishwashers
- Gas lines for grills, pizza ovens, or fire features
- Electrical wiring for lighting, outlets, and appliances
- Drainage planning to prevent water from pooling around structures
For you as the homeowner, this stage can feel technical, but it’s where the project is set up for long-term success. A properly prepared site and well-planned infrastructure mean fewer disruptions later—and a finished kitchen that works seamlessly from day one.
By the end of site preparation, you’ll have confidence that your outdoor kitchen is ready to move from planning into actual construction.
Phase 4: Materials and Appliances
Once the site is ready, the next stage is selecting the finishes and features that will define both the look and performance of your outdoor kitchen. In Napa Valley, where luxury homes demand lasting quality, these choices matter as much as the design itself.
Luxury finishes set the tone. The right materials give your outdoor kitchen a sense of permanence and elegance while also standing up to year-round use. Homeowners often consider:
- Natural stone countertops such as granite, quartzite, or soapstone for durability and timeless beauty
- Bluestone or travertine patios that ground the kitchen in the landscape and create a cohesive outdoor living area
- Premium woods like ipe or teak for cabinetry and accents, adding warmth and contrast against stonework
- Custom tile or stone backsplashes that bring color, pattern, and personality into the design
While finishes define the aesthetic, appliances complete the function. Many homeowners invest in:
- Professional-grade grills with multiple cooking zones
- Wood-fired pizza ovens that double as a centerpiece for entertaining
- Wine refrigerators and storage drawers to keep bottles perfectly chilled
- Outdoor-rated refrigeration for ingredients, mixers, or prepared dishes
As the homeowner, this phase gives you a chance to align your kitchen with your lifestyle. Do you want a sleek, modern space with polished stone and stainless steel, or something more rustic with warm wood and handcrafted tile? These decisions don’t just influence the look of the kitchen—they determine how it will perform for years to come.
Phase 5: Construction and Craftsmanship
With the design finalized, site prepared, and materials selected, your outdoor kitchen is ready to move from plans to reality. This stage is where vision meets execution—and it requires a blend of expert craftsmanship and careful project management to get it right.
Luxury outdoor kitchens involve multiple trades working together. Skilled masons, carpenters, electricians, and plumbers each play a role in building a space that feels seamless and intentional. Attention to detail here is what separates a basic patio kitchen from a six-figure luxury investment. Some of the work typically includes:
- Masonry and stonework for countertops, patios, fireplaces, or retaining walls
- Carpentry for pergolas, custom cabinetry, and framing
- Appliance installation with precision to ensure proper fit and function
- Integration of utilities so plumbing, gas, and electrical systems perform safely and reliably
For homeowners, this stage can feel both exciting and overwhelming. You’ll see the physical transformation unfold, but it’s also where timelines, weather, and coordination must be managed carefully. A trusted contractor provides peace of mind by overseeing the schedule, maintaining quality standards, and ensuring every trade works toward the same high-end result.
By the end of construction, your outdoor kitchen begins to look like the space you envisioned—solid, refined, and built to last for decades.
Phase 6: Finishing Touches and Styling
After weeks of construction, the outdoor kitchen is finally standing, but it’s the finishing touches that transform it from a build site into a true living space. This stage is about refinement—the details that make the kitchen not only functional, but inviting and polished.
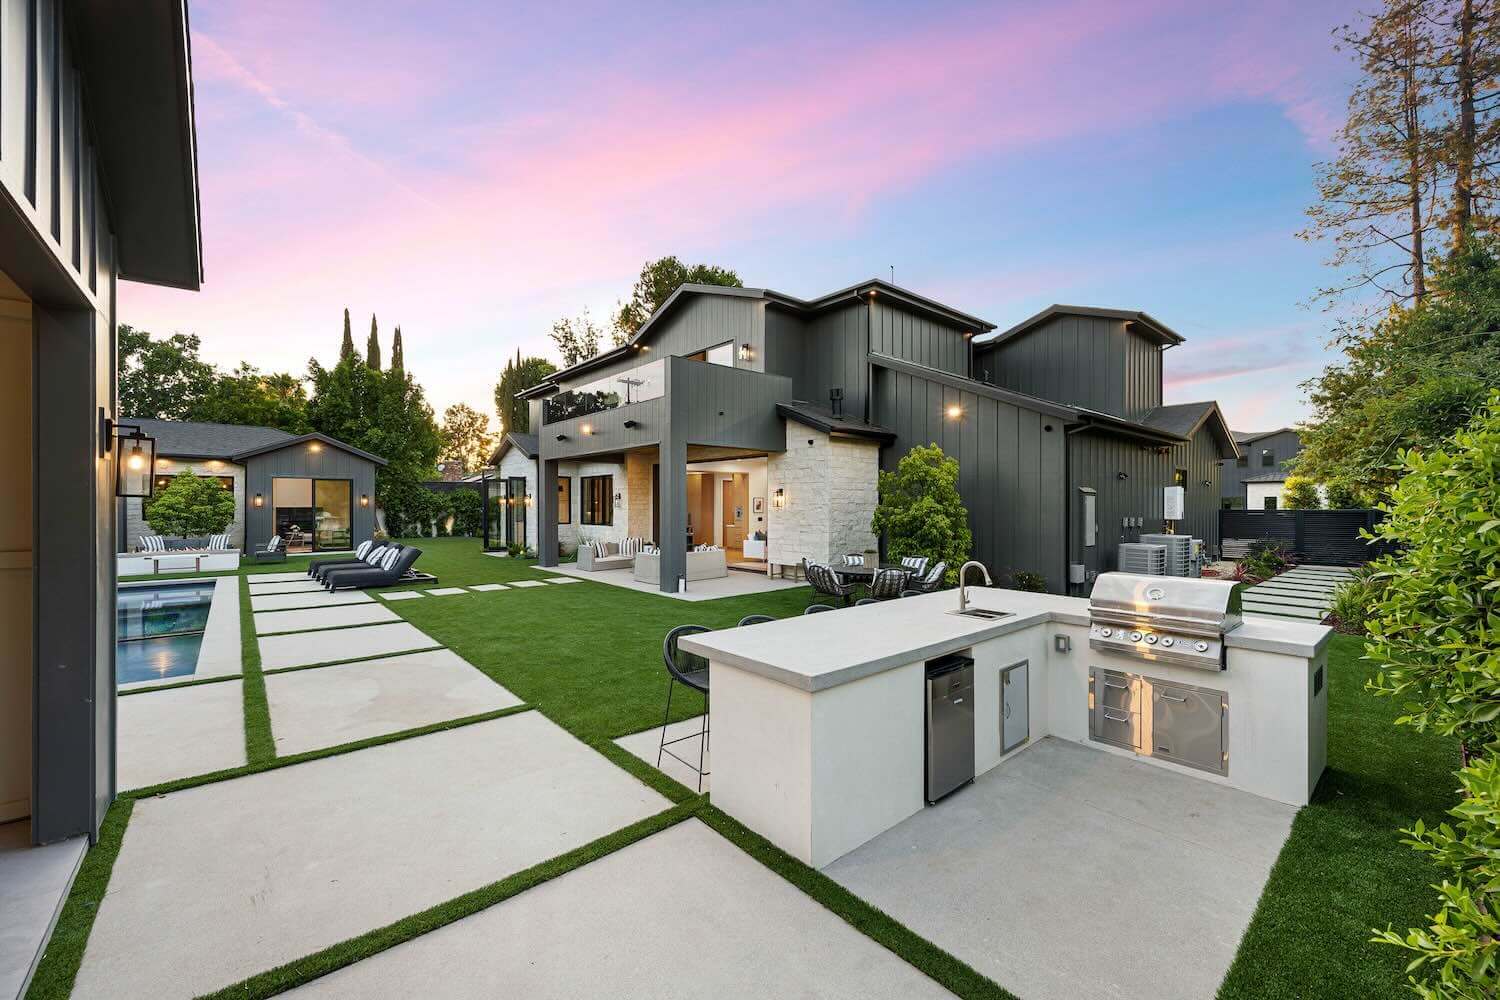
Lighting plays a major role. A thoughtful plan layers task lighting for cooking, accent lighting to highlight stonework or pergolas, and ambient lighting that sets the mood for late-night gatherings. The right mix ensures the kitchen works as beautifully at 9 p.m. as it does at noon.
Comfort and flow come next. Many homeowners incorporate:
- Bar seating for casual meals and conversation
- Dining tables designed for hosting larger groups
- Lounge areas with sofas or fire features that extend beyond the kitchen itself
Finally, styling ties the project together. This can include:
- Coordinated finishes between kitchen surfaces and surrounding landscape
- Décor elements like planters, outdoor rugs, or custom backsplashes
- Integrated shade structures or pergolas that balance aesthetics with comfort
For homeowners, this is often the most satisfying stage. The structure is complete, but now it feels lived-in and ready to host family dinners, wine tastings, or weekend gatherings. It’s where the investment shows its personality.
Phase 7: Walkthrough and Completion
The final stage is all about confidence—making sure your new outdoor kitchen is not only beautiful but fully ready for everyday use. After weeks of design and construction, this walkthrough is where you confirm that everything has been delivered to the standard you expect.
During this phase, you and your contractor will typically:
- Test appliances — ensuring grills, ovens, refrigeration, and sinks function correctly
- Check utilities — verifying gas, plumbing, and electrical systems run safely and smoothly
- Review finishes — confirming stonework, wood details, and lighting were installed with precision
- Address adjustments — noting any fine-tuning needed before the project is considered complete
For homeowners, this moment is often the most rewarding. It’s the first time you can step into the finished kitchen without construction noise or tools around—just the finished space, ready for entertaining.
By the end of this stage, the kitchen is handed over for your use, and the project officially shifts from “in progress” to “completed investment.” It’s the point where vision, planning, and craftsmanship have come together—showing you firsthand how custom outdoor kitchens are built to last for years to come.
Bringing It All Together
Understanding how custom outdoor kitchens are built gives you a clearer picture of what goes into these projects—from design conversations to the final walkthrough. Each phase has a purpose, and together they create a space that feels seamless, functional, and built to last.
For homeowners in Napa Valley, the process isn’t just about building a place to cook—it’s about creating a destination for entertaining, relaxing, and living outdoors in comfort. By understanding the typical stages, you’re better prepared to make confident decisions, ask the right questions, and see how your investment comes together step by step.
Ready to bring your vision to life? Schedule a consultation and explore what’s possible with a custom outdoor kitchen designed around your home and lifestyle.
